Presets Explained.
- Aug 28, 2019
- 3 min read
Updated: Jan 27, 2020
Let's start with clearing the air and pin down what presets are. Presets became a big thing when Adobe launched and free easy to use mobile version of its photo editing app, Lightroom. Don't run away. I promise you, it's all good. I wouldn't call it an easy guide if we would start getting into professional photography jargon.
Bottom line is: Presets are like filters, only better. When you place a filter on top of your original image, it is like a top layer which you can change its density of. It is quite limited to adjust and can affect the quality of your image. On the other hand when you work with presets you apply a set of saved settings to your images, so if you are not happy with the end result you can go back and adjust certain elements of the edit, rather than just a full overall look. Is it too warm/yellow - change the temperature, is it too light or dark - edit exposure or go in and individually adjust the highlight/white/black/shadow. Does this make sense?
Now let me show you how you can save a preset to your phone and how you can use it on your own images. I have a free preset available to you when you sign up for my newsletter on the home page.
LIGHTROOM MOBILE PRESET INSTALLATION STEP-BY-STEP


1. Make sure to have the Lightroom Mobile CC downloaded on to your phone. It's completely free and you are going to enjoy editing other photos on it in the future.
2. Have your .dng files uploaded on to an online platform such as google drive or Dropbox.
*.dng files are your presets
If you have your presets through me, you have the Dropbox link set up already so you can just go directly there and click on to the preset you'd like to download.


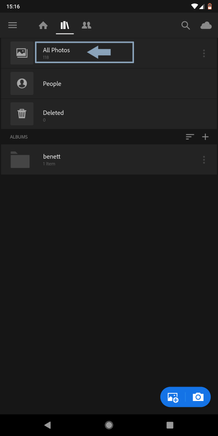
3. Open Lightroom on your phone and go to All Photos. Please note that it takes sometime to have your file imported so if its not there straight away don't worry, just give it a sec.
In your photos look for this image below. If you can't find, it it is worth to have a look at your 'sort by...' settings and make sure your images are sorted by import date and not capture date.
Once you have found this image, open it and follow the steps shown below.
three little dots -> create preset -> name the new preset


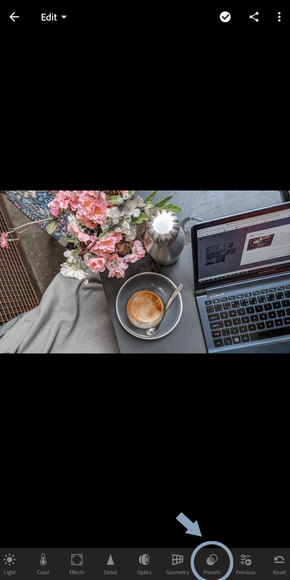
4. Technically you are all done. If you wish to edit one of your own photos then go back to your images, select the photograph you want to edit and on the bottom bar find presets -> user presets -> your saved preset.
Sometimes the preset needs tweaking on certain images. Once you have saved the preset on to your new photo you can carry on adjusting little bits like temperature, exposure or anything you'd like.


Give it a go and I hope you enjoy Lightroom Mobile as much as I do. I create personalised presets for my clients perfectly matching their style, branding and fit the general circumstanced of their original photo, so there is less tweaking needed.
Any questions? Feeling stuck? Drop me a DM on Instagram, Facebook or any platforms you can think of. Happy Editing!
B xx


Comments